Papa Smurf Mods
Mods, skins, ATS, ETS2 and more

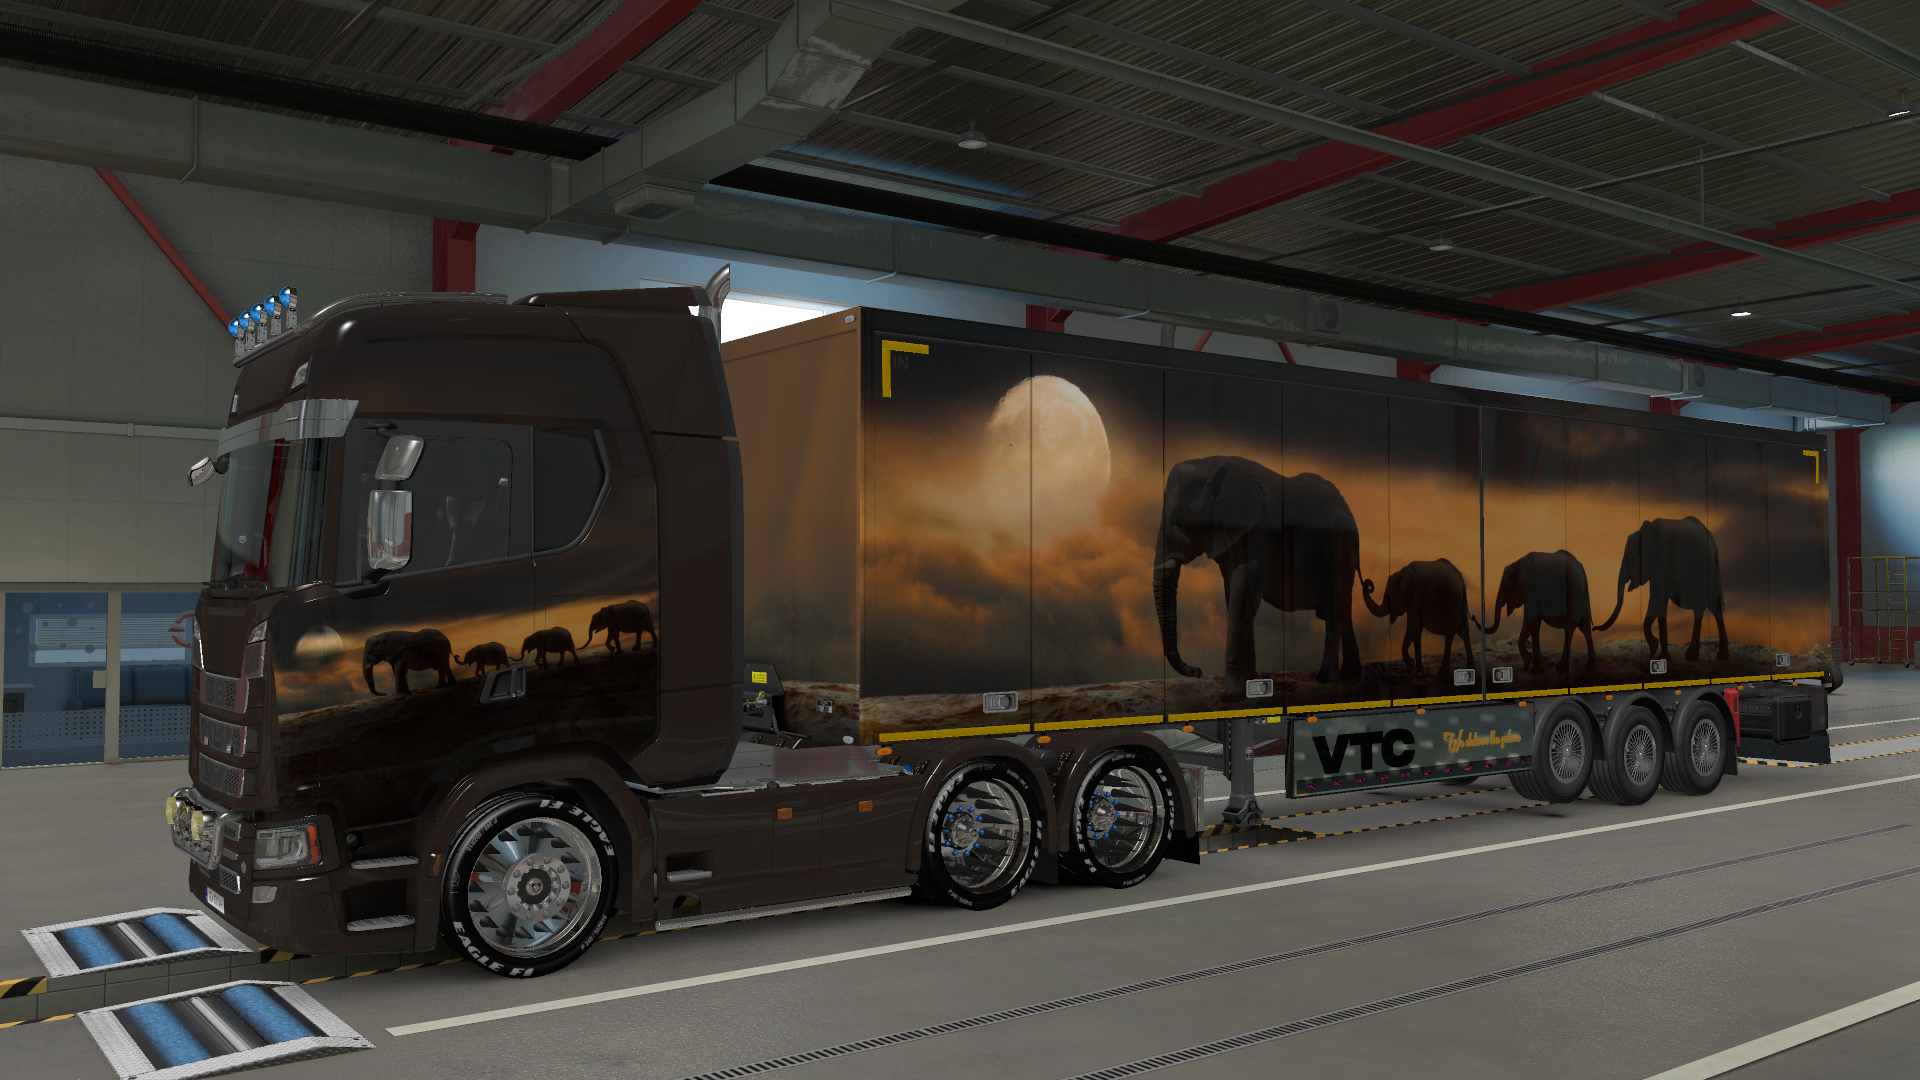
How to make a skin for trailer with mods studio 2? Full step-by-step guide/tutorial. PART 3
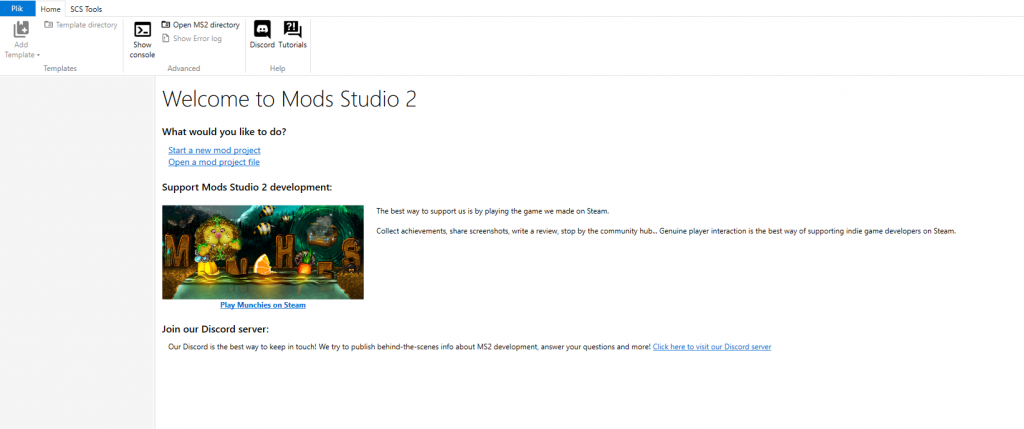
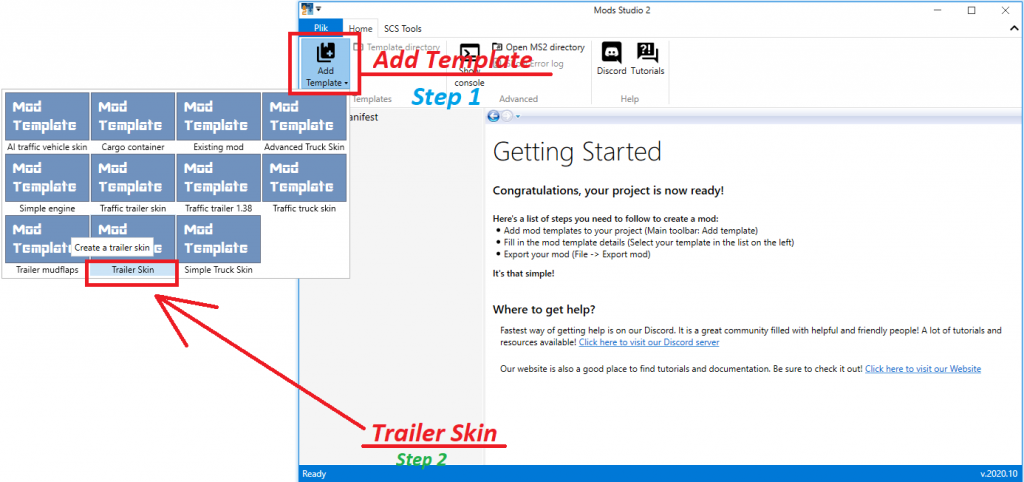
In the last step, you installed mods studio 2 and you should be able to run it and see a window like this. Click:
Start a new mod product
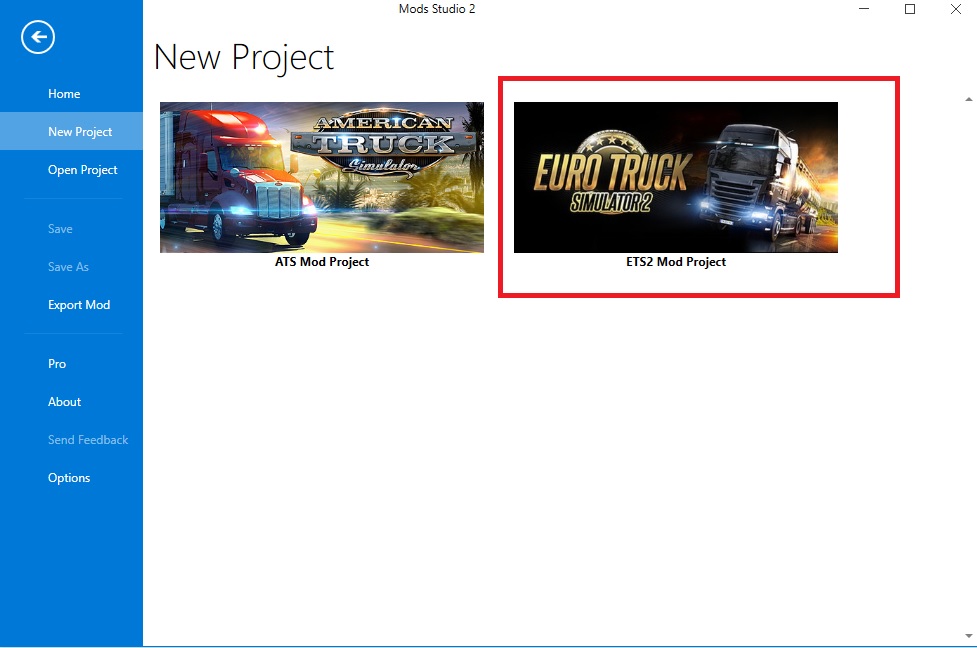
A new window will open. Click ETS2 Mod Project.
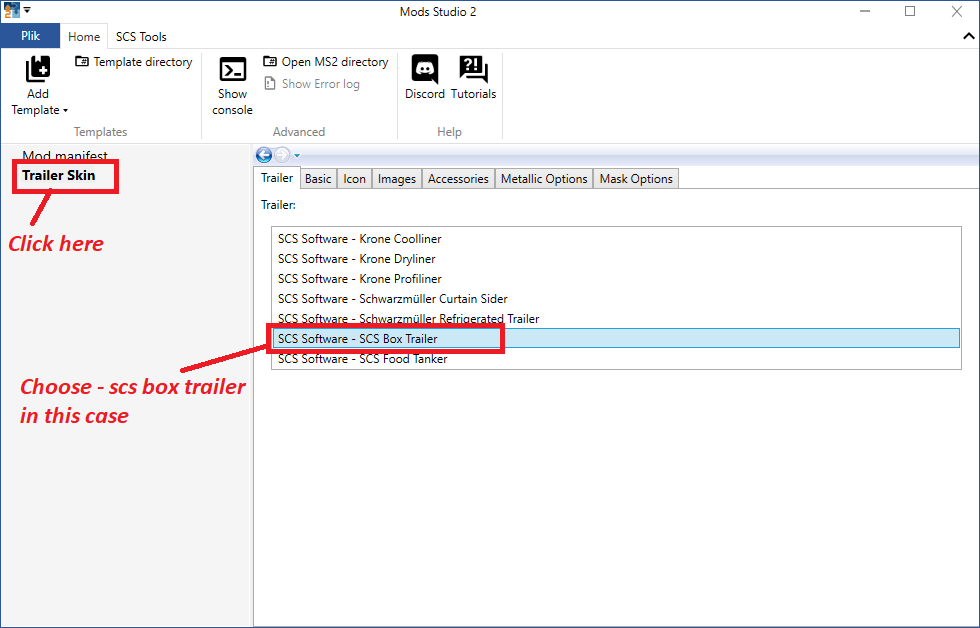
Click “Trailer Skin”
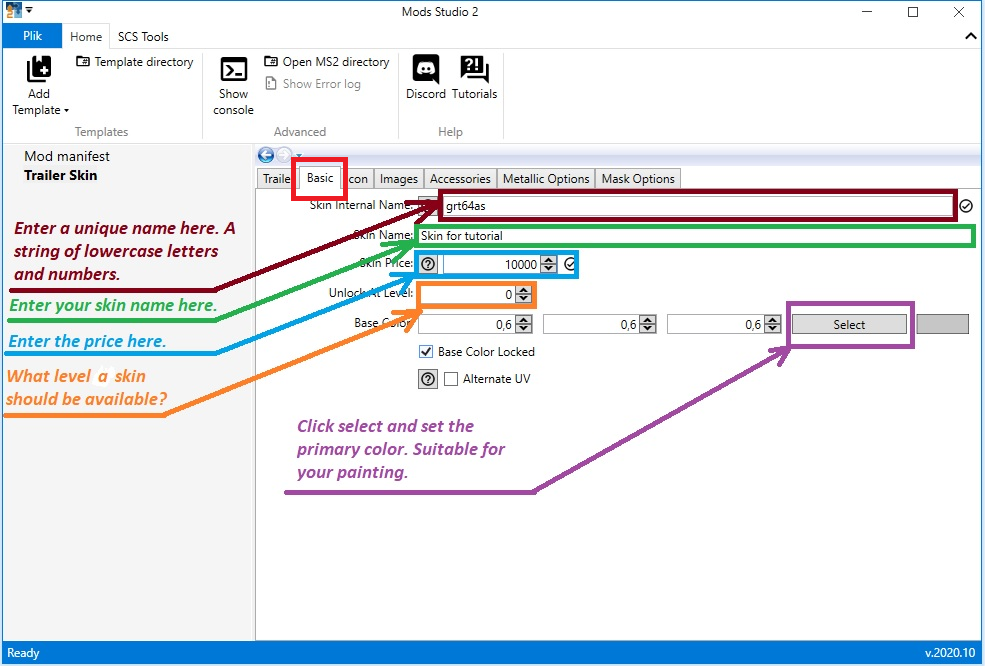
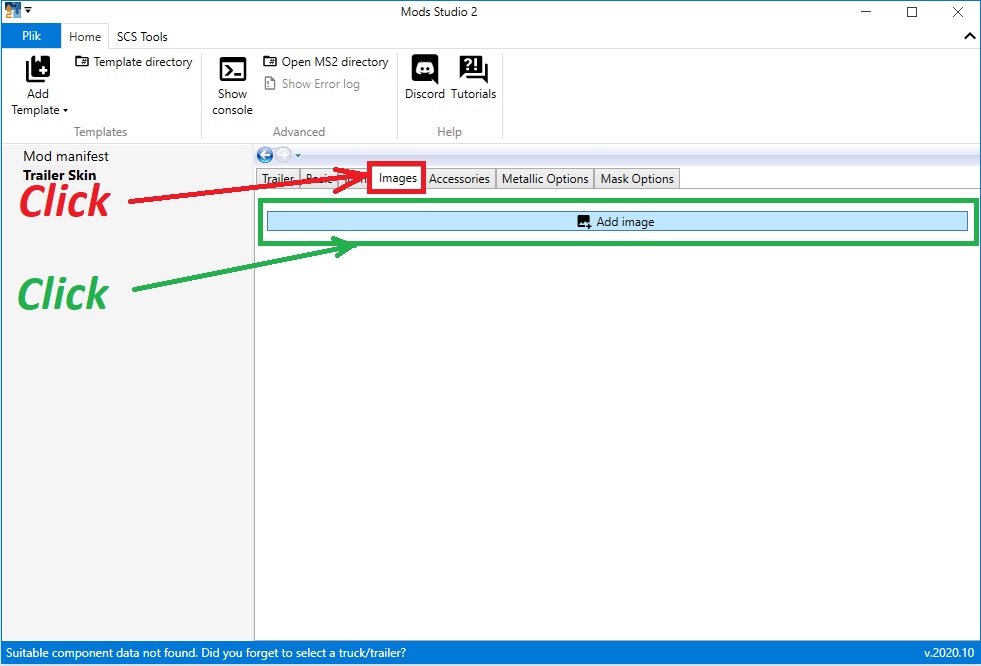
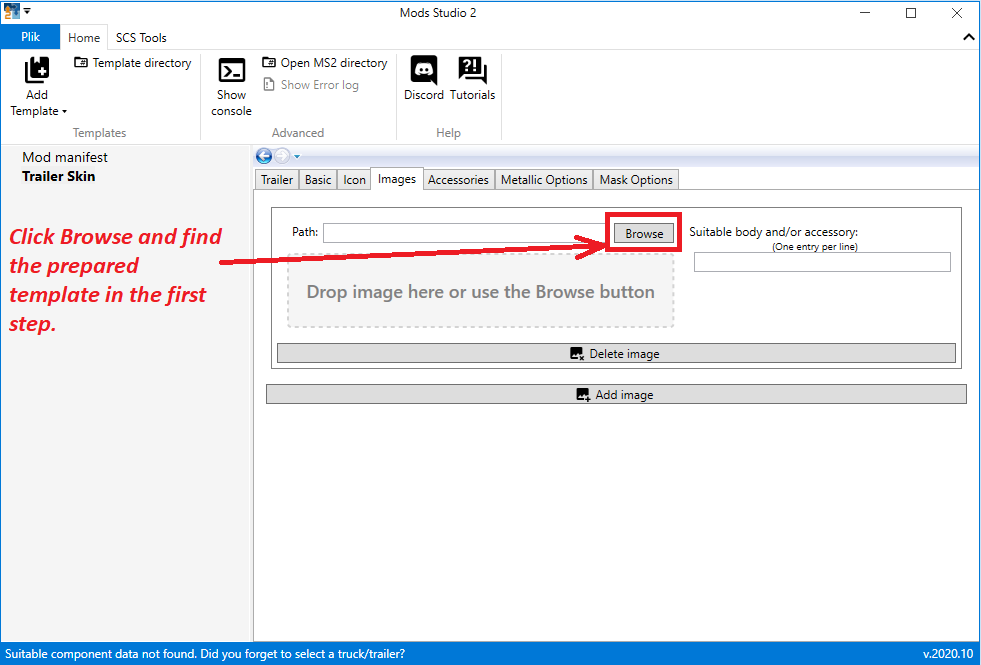
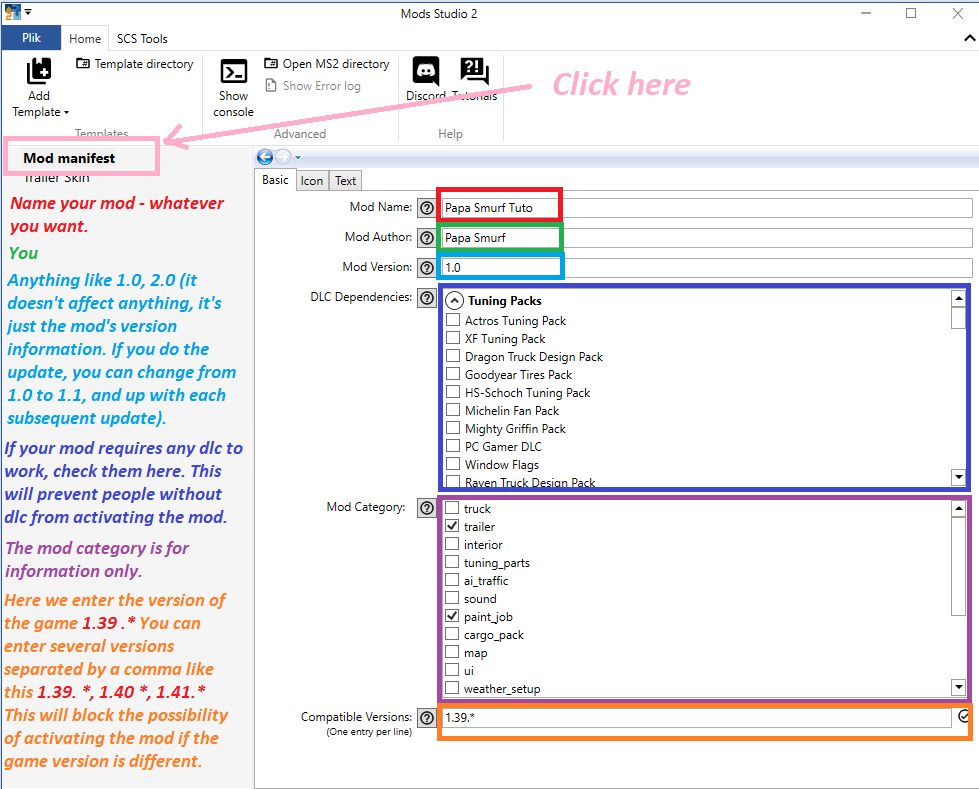
Go to Basic now and fill out all the fields as shown in the pictures below.
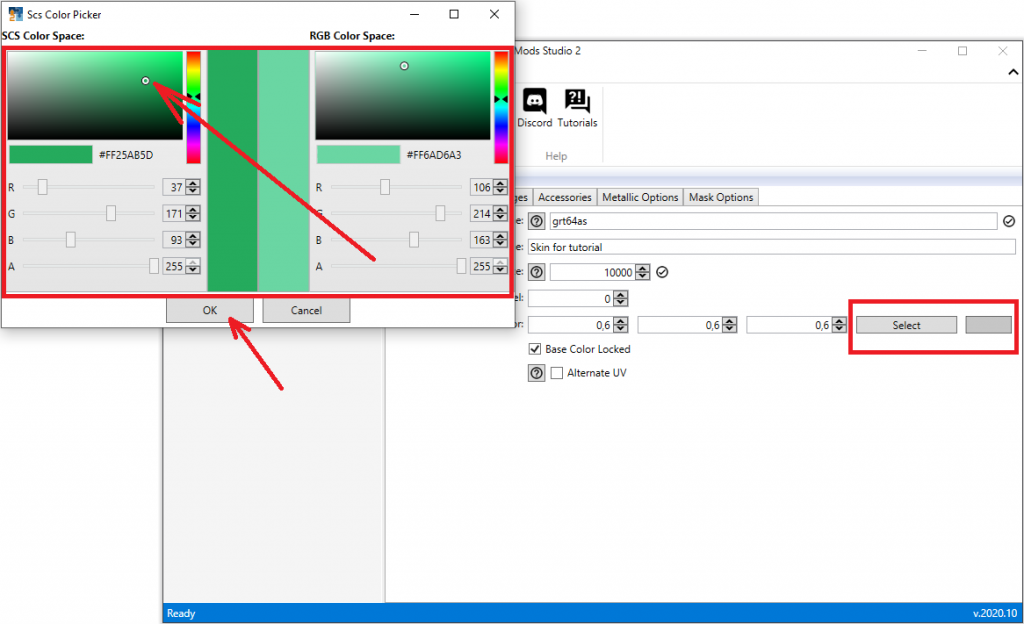
This is the primary color, you have to set the color to suit your painting. If you made a template with a lot of red color, set a similar color here.
Next step is setting up the icon. Take a look at the photo below.
How to prepare your own icon? CLICK
Once done, do not close mods studio 2 and go to PART FOUR
How to make a skin for trailer with mods studio 2? Full step-by-step guide/tutorial. PART 4 – Manifest file setup and short explanation.
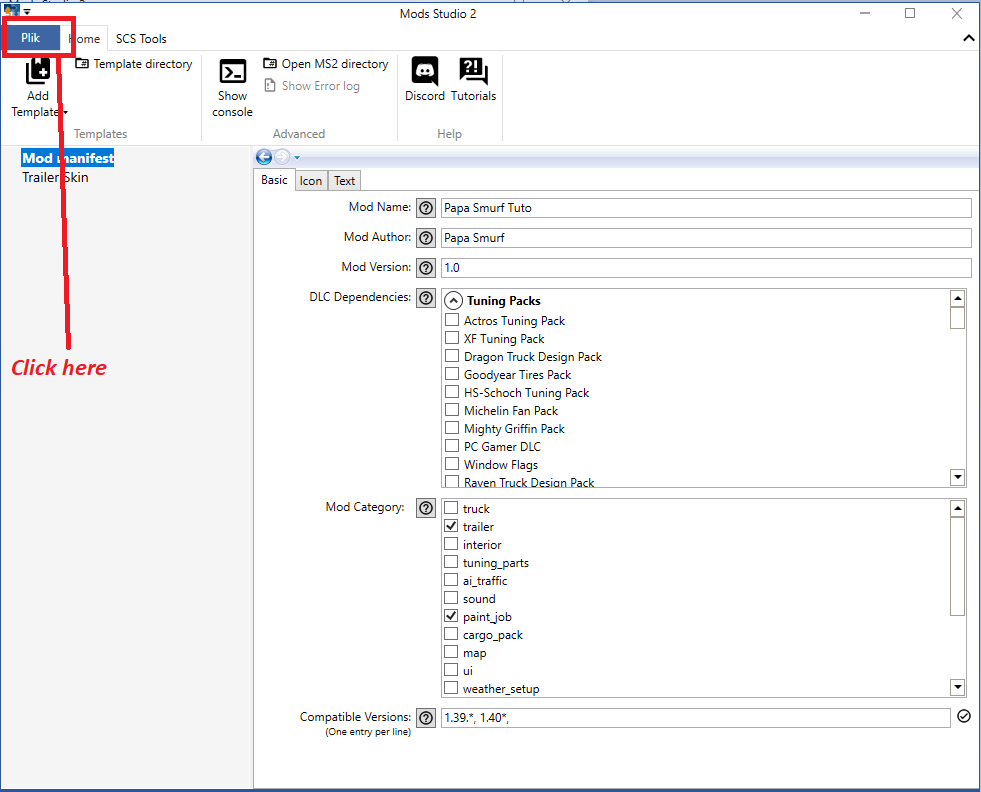
The manifest file is mainly used to provide all information in the mod manager and to set mod properties such as game version, mod category or required dlc. Entering the game version in the game version field will cause the mod to be blocked and it will not be possible to enable it on a different game version than the one set in the manifest file. If you do not enter anything, the mod can be activated on all versions of the game. I think that when it comes to typical mods, it is worth using this security, but in the case of skins it is unnecessary, but this is my private opinion. Just as the game version affects whether the mod can be activated, the required dlc fields do the same. I think that in the case of skins it is unnecessary to check any box because if someone does not have, for example, a krone trailer, they will not use this skin anyway. It is different in the case of mods, but this is a separate topic and I will not deal with it now. I would not enter anything in the game version field and I would not mark any dlc.
See the picture below.
If you’ve done everything, it’s time to export your skin. Go to Part Five

You subscribe to the internal subscriber list to be notified about new mods that will be published on the Papa Smurf website. The list is only for internal communication between me and you and will never be used for other purposes or passed on to third parties. You can unsubscribe at any time without unnecessary formalities.
How to make a skin for trailer with mods studio 2? Full step-by-step guide/tutorial. PART 5 – Exporting the skin and short explanation.
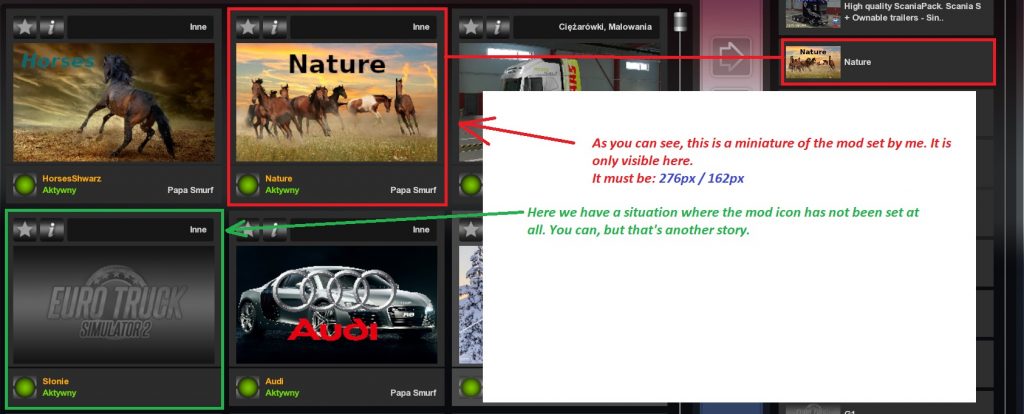
To export a mod in older versions of mods studio 2 you need to set the mod icon. The default mod icon will be set automatically in the new version. What is this? This is the image you see in the mod manager. As pictured above. A thumbnail with where we can show a preview of the skin, etc.
To prepare such an icon, you need to create an image with dimensions of 276px / 162px, put on it whatever you want to be there and save it as JPG. You can also use the default icon. It doesn’t change anything. However, if you want your skin to look more professionally, it’s worth to make this icon by yourself.
Whatever you decide, it’s time to go to the last field, which is optional. It’s up to you. In this field you can add more information about your mod. You can write whatever you want there. By using prefixes in square brackets you can make the text colored. So, for example, you can write [red] Visit my website: www.papasmurfmods.com
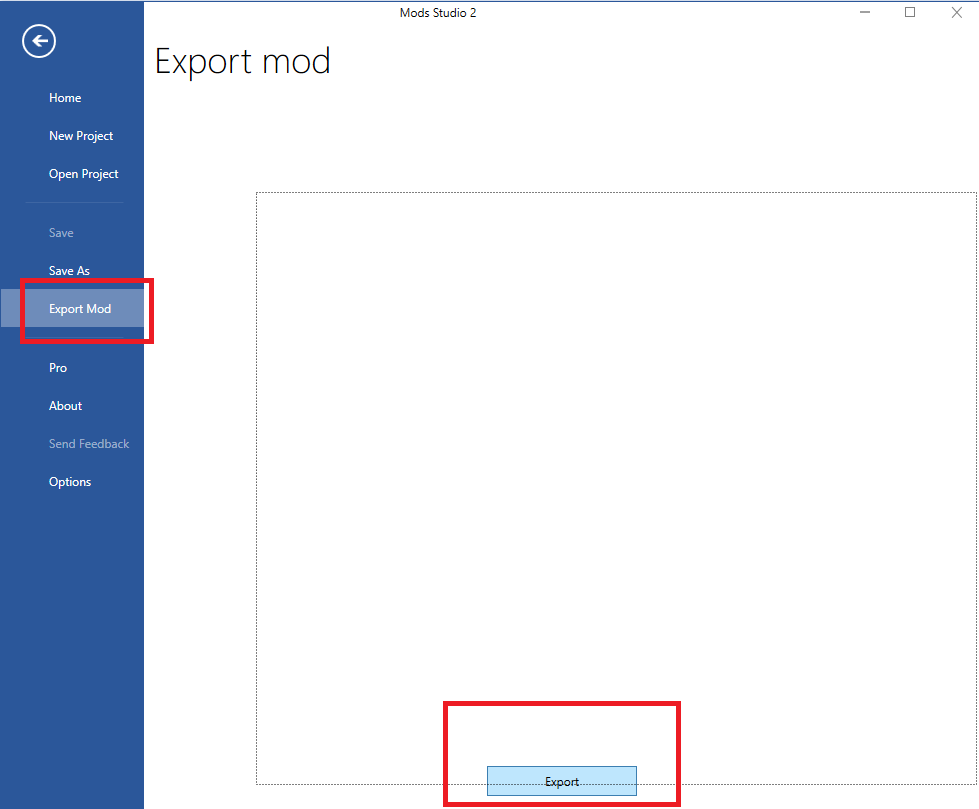
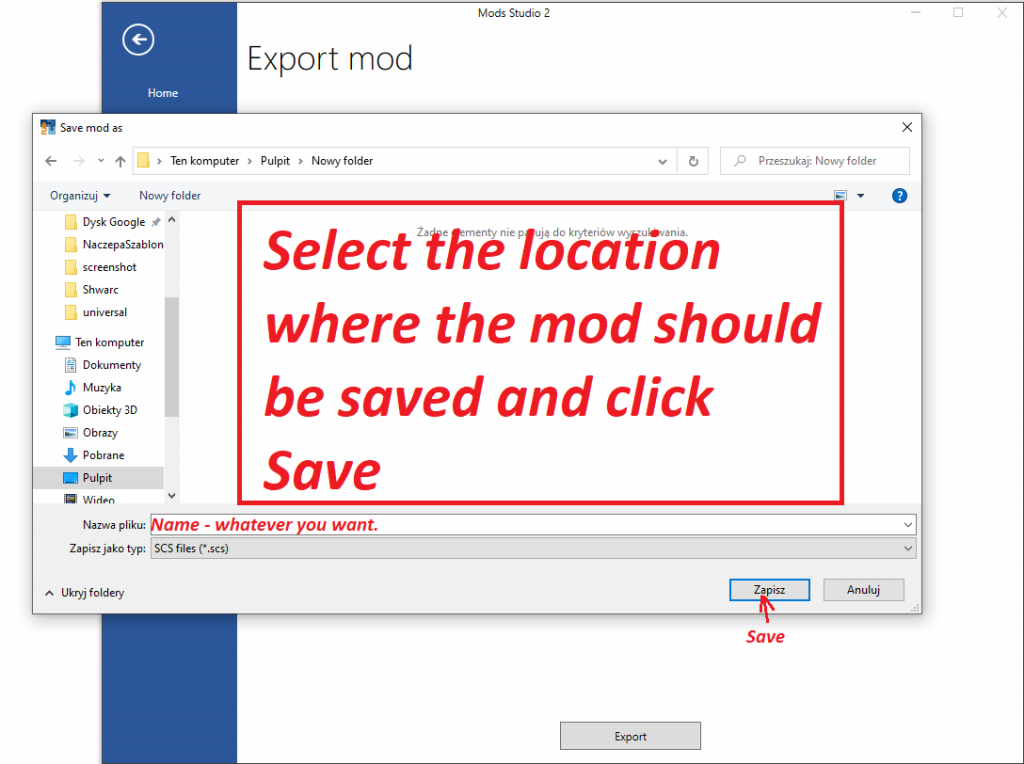
Once done, click on the file in the top left corner and select Export Mod and at the bottom, click Export.
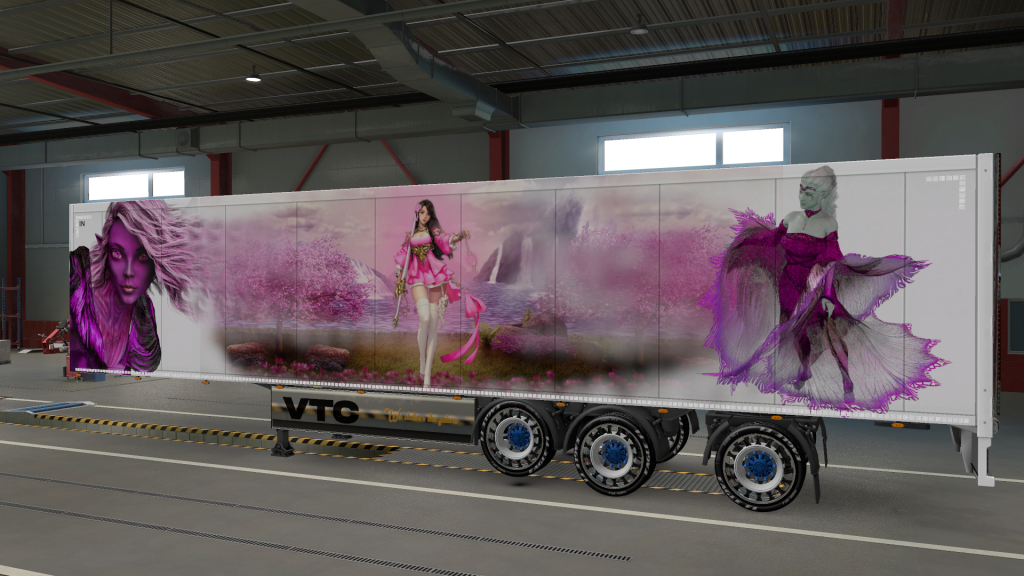
That’s it. Now copy and paste the received scs file into the mod folder in the game, activate the mod and check if the skin works.
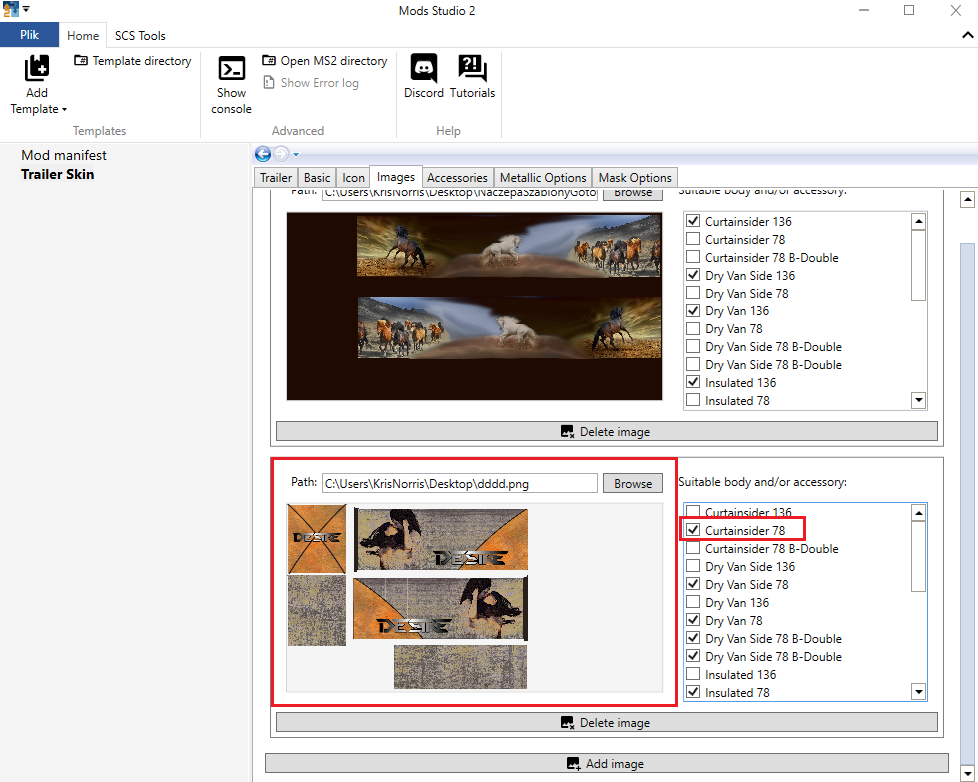
If you want the skin to be also used on short trailers, you have to make a smaller template mentioned at the beginning and add it in the mods studio as a second picture. Then you select next to all fields that end the name with 78. See the picture below. There are 25 fields for a long and a short trailer in total. I always count them to make sure that I did not miss any. So 9 for long and 16 for short.
