Papa Smurf Mods

Mods, skins, ATS, ETS2 and more

How to make a skin for trailer with mods studio 2? Full step-by-step guide/tutorial. PART 5 – Exporting the skin and short explanation.

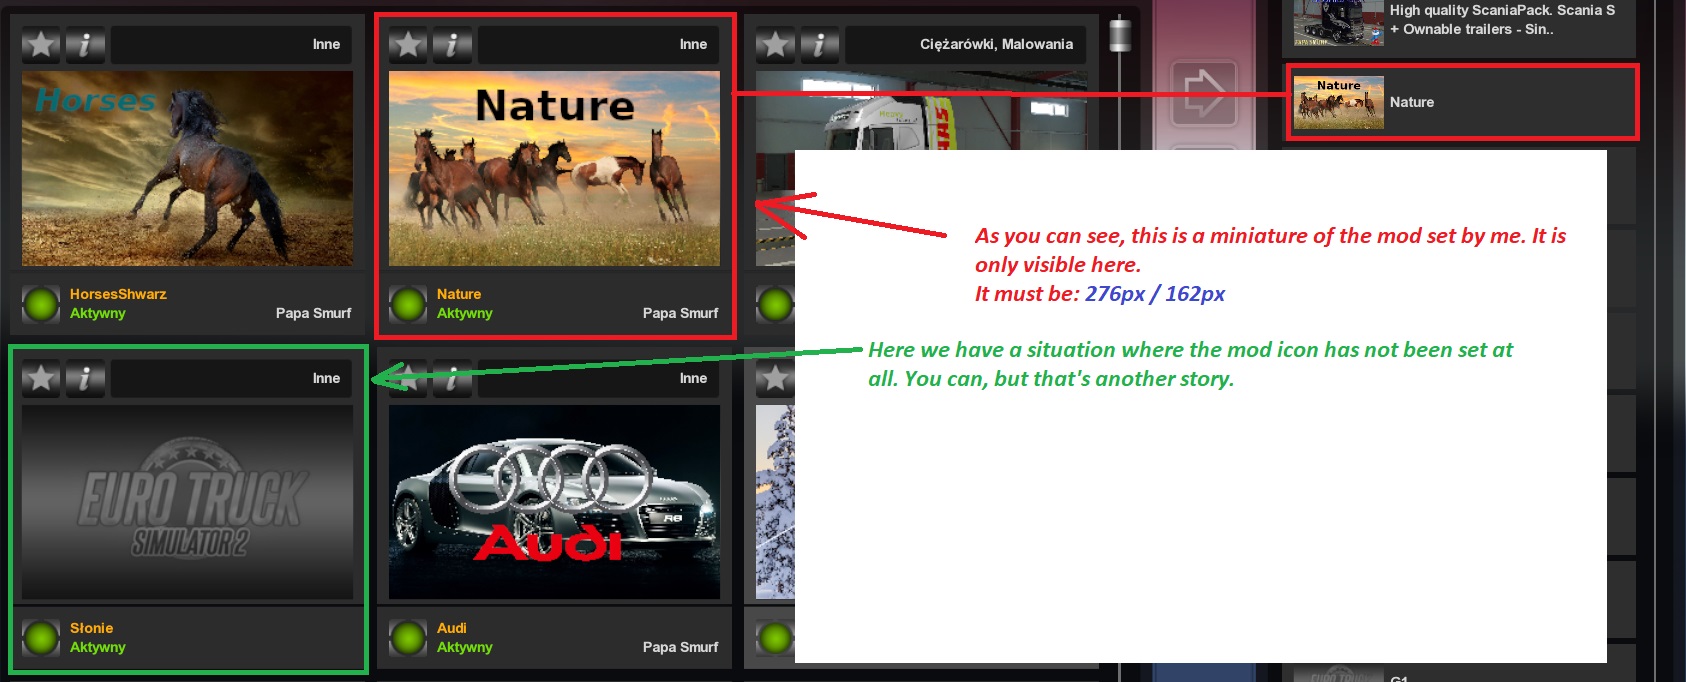
To export a mod in older versions of mods studio 2 you need to set the mod icon. The default mod icon will be set automatically in the new version. What is this? This is the image you see in the mod manager. As pictured above. A thumbnail with where we can show a preview of the skin, etc.

To prepare such an icon, you need to create an image with dimensions of 276px / 162px, put on it whatever you want to be there and save it as JPG. You can also use the default icon. It doesn’t change anything. However, if you want your skin to look more professionally, it’s worth to make this icon by yourself.

Whatever you decide, it’s time to go to the last field, which is optional. It’s up to you. In this field you can add more information about your mod. You can write whatever you want there. By using prefixes in square brackets you can make the text colored. So, for example, you can write [red] Visit my website: www.papasmurfmods.com

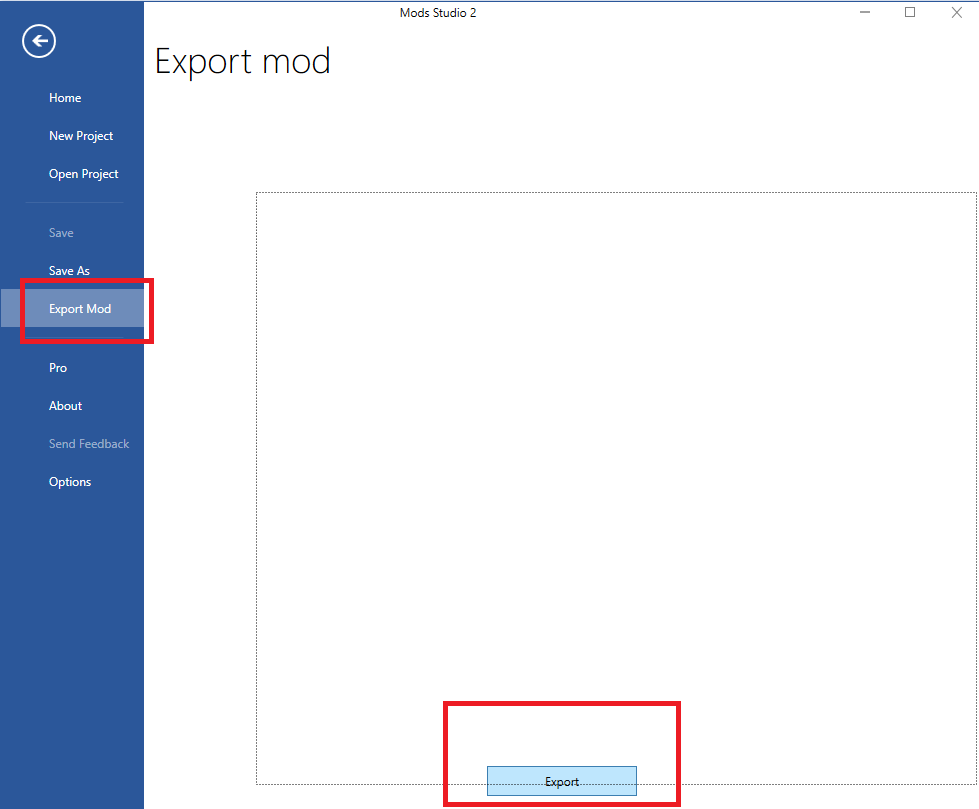
Once done, click on the file in the top left corner and select Export Mod and at the bottom, click Export.

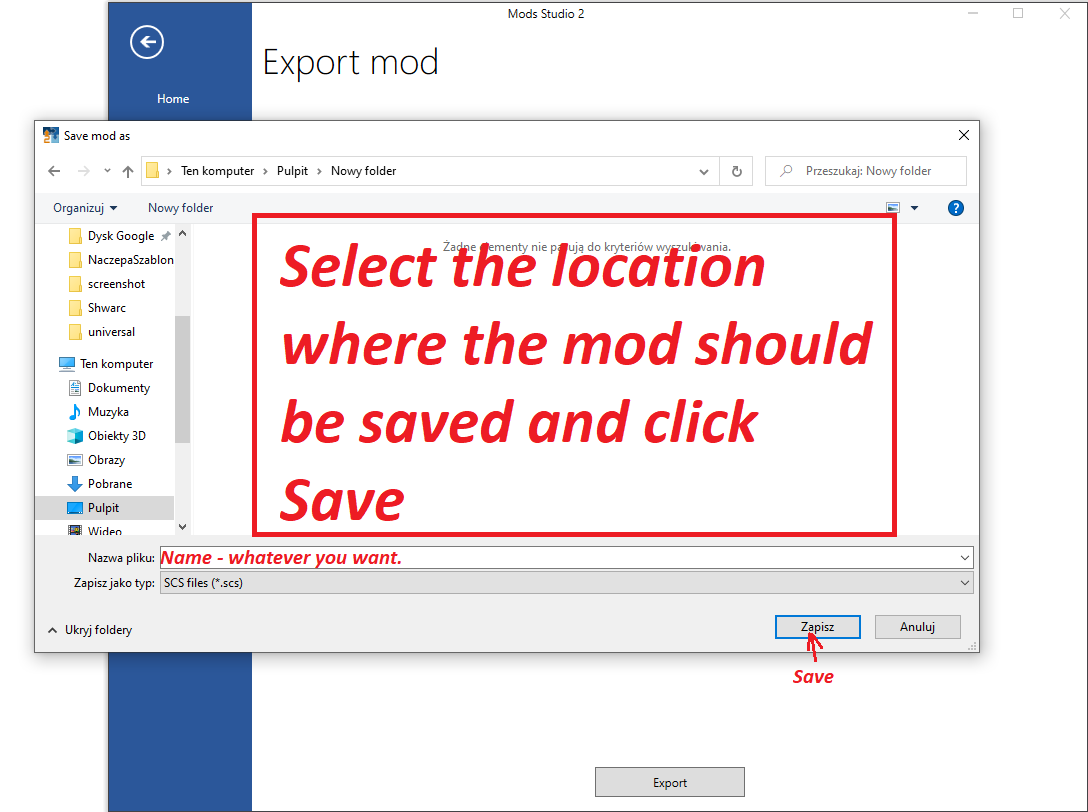
That’s it. Now copy and paste the received scs file into the mod folder in the game, activate the mod and check if the skin works.

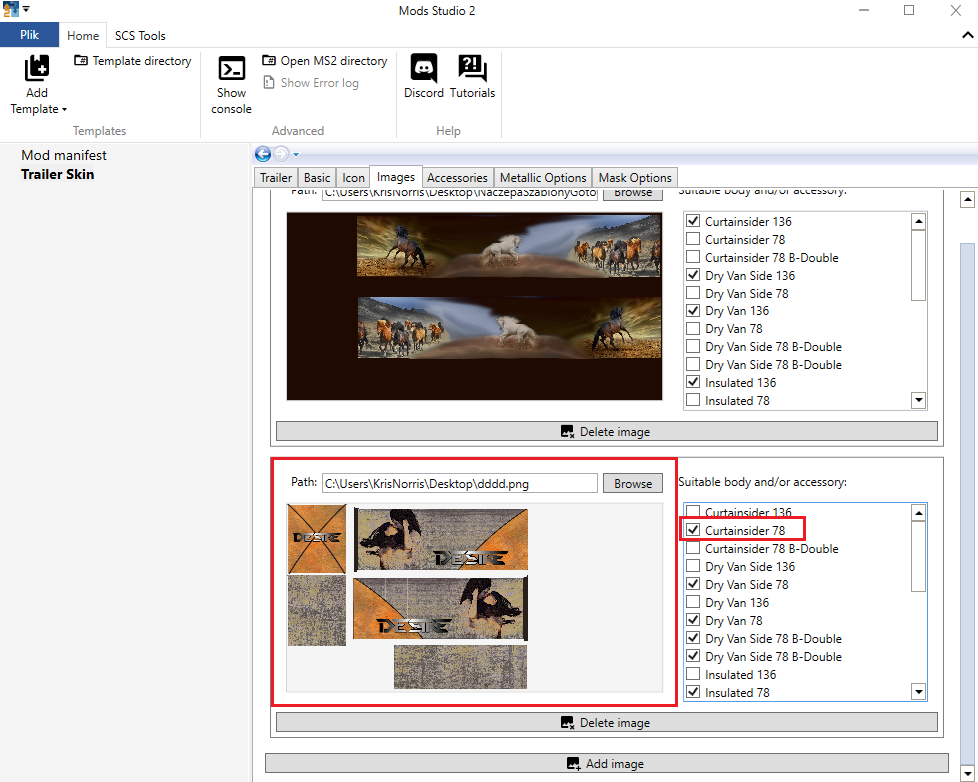
If you want the skin to be also used on short trailers, you have to make a smaller template mentioned at the beginning and add it in the mods studio as a second picture. Then you select next to all fields that end the name with 78. See the picture below. There are 25 fields for a long and a short trailer in total. I always count them to make sure that I did not miss any. So 9 for long and 16 for short.

Mods studio and what you need to know?

Mods Studio is an easy to use program. You just have to follow a few tips.

TIPS

  1. Remember about texture sizes (dds). It must always be 256px / 64px for the thumbnail visible in the store. If instead of 64px will be 65px probably the skin will not work or we will have a game crash. The same applies to the jpg photo shown in the mod manager, it must be 276px / 162px. However, when it comes to truck textures, sizes may vary, but you must follow a certain rule. So for example for each truck will work texture 512px / 512px and its doubled value, i.e. 1024px / 1024px and again doubled, i.e. 2048px / 2048px and 4096px / 4096px. (I even made a skin with 8192px / 8192px texture but it is an extremely large texture so 4096 will be enough for quality lovers).
  2. The manifest file is the file responsible only for the information displayed in the mod manager. These are information such as: mod name, mod thumbnail setting, mod description, version and game compatibility (i.e. is it version 1.36 or 1.35 etc.).
  3. For semi-trailers, the principle of doubling is identical, except the texture of the semi-trailer is a rectangle, not a square, as in the case of trucks. Its values ​​start from 1024px / 512px as well as 2048px / 1024px and up 4096px / 2048px. In my opinion, it is best to work with 4096px / 2048px and the quality is also excellent.
  4. To use mods studio you must install the .NET Framework in the version specified on the mods studio developer website. However, to use the .NET Framework and for everything to display correctly you need to install Visual studio and this information is often provided on the website when downloading the .NET Framework. Read exactly what you need to run a specific package / program.
  5. If you are doing an advanced truck, you also need to set accessories. You will know what’s going on when you start your first project. The point is that advanced trucks have a accessories. For some of them you will find templates in the internet, for others, I don’t know because I have never looked for every temp. I do it so that I create a png square with dimensions 64px / 64px (of course, if you do 16/16 it will work too). Then I set the square with a color matching the skin of the truck and that’s it. I set it later in the mods studio for accessories and mark all the boxes on the right. If you do not have boxes, only information about entering the name of the element, it means that you do not have correctly installed all components such as net framework or visual studio.
  6. The most important tip 😉 Everything must match. As I mentioned, one pixel difference is enough and it will crash. If you don’t believe me, do an experiment. Skin internal name – the point is that it is like the name that the program will set in most file names, textures, tobj files etc. It must be unique with each new mod/skin so that there are no conflicts. DON’T GIVE MORE THAN 10 CHARACTERS.

Program author’s website https://www.mods.studio/